It’s Thanksgiving. That means pumpkin pie! …Well…it’s not Thanksgiving quite yet. But before I go back to San Marino and make a giant mess in my Mom’s kitchen, I wanted to bake and puree some pumpkins ahead of time. I got 6 Sugar Pumpkins, sometimes also called Pie Pumpkins, from Trader Joes and baked them up. There isn’t really a recipe today because it’s just pumpkins.
There are a few ways to cook a pumpkin. The top few are baking, steaming, and microwaving. In my experience, I’ve stuck to baking for 2 main reasons: I don’t have a steamer and microwaving doesn’t cook the pumpkin as evenly as baking. If you have a steamer, I’ve been told it cuts down on cooking time significantly, so go for it!
Directions: Preheat your oven to 350°F and line cookie sheets with foil. Cut the pumpkins in half. (Be careful! Round things tend to slip!) I cut mine along the center to avoid dealing with the stem. Scoop out all of the seeds and strings with a spoon. Be patient! You really don’t want any of the strings in your puree. They ruin all your hard work! And if you want, you can bake the seeds too!
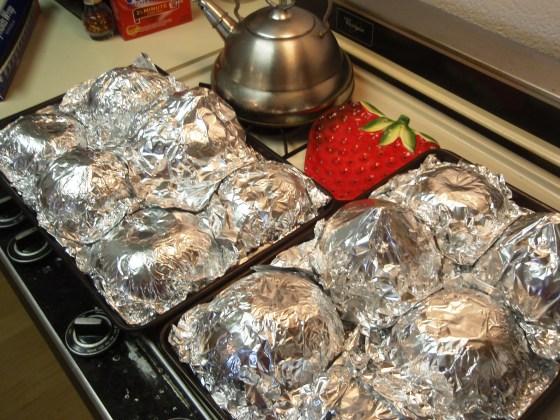
Flip the pumpkins over so that they are cut-side-down on the cookie sheet. Then cover each pumpkin with a square of foil.
Bake the pumpkins for 1.5 hours at 350°F. (My oven is coo-coo-bananas, and thought 350 = 450. It was at that high temperature for probably 20 minutes, but I still let them go the full 1.5 hours after reducing the temp. They’re robust little guys, so my puree turned out just fine.)
After they finish baking, remove the baking sheets from the heat and allow the pumpkin to cool for ~20 minutes. Once they’re cool enough to handle, remove the foil, and flip them over. There will be a nice caramelized edge on the cut side.
Use a large spoon to scoop out the soft pumpkin. Make sure to leave out the caramelized bits and any of the rind.
Use a food processor to puree the pumpkin. (I know it looks all mashed now, but the food processor will make your pumpkin really smooth.)
The big bummer that I found out this year is that the USDA recommends against canning pureed pumpkin. It actually recommends canning cubed pumpkin (weird), and canning it under pressure. People still can pureed pumpkin, but I guess there is an increased pathogen risk. If you’re interested in canning the puree despite the risks, check out this website for a how-to. But I decided to skip the canning because I don’t have the proper equipment; instead I went with the freezing method.
One major hint in freezing something liquidy, like pumpkin puree, is to freeze it in ice cube trays. Use plastic wrap to line the ice cube tray, and just scoop your pumpkin into each cube. You can tap the tray on the counter to make sure the pumpkin is sinking all the way down into the cube.

My 6 pumpkins needed 4 ice cube trays to freeze all the puree, not including about 1.5 C for some cookies I made that night.
I gave them about 12 hours to freeze all the way. Then you just peel the frozen cubes off of the plastic wrap, and put them in a freezer bag. Now when you thaw out the pumpkin, you have small portions to pick from, making it easy to get just the right amount that you need. (This method will also work for your store-bought pumpkin if you have left overs.)
Frozen puree will stay for about 6 months, which will give you plenty of time to get through it all. When you thaw out the frozen pumpkin, let it thaw on some cheesecloth to get out some of that extra moisture.
I’ll post the recipe for my soft pumpkin cookies soon, but I have to get packing for my drive down to San Marino!
Enjoy!


Yumm… Can’t wait to see you!!!
Pingback: Pillowy Pumpkin Cookies « Heather HomeMaker
Pingback: Thanksgiving: Pumpkin Pie « Heather HomeMaker
Pingback: Christmas Persimmon Bread « Heather HomeMaker
Pingback: Our Thanksgiving Table | Heather HomeMaker